

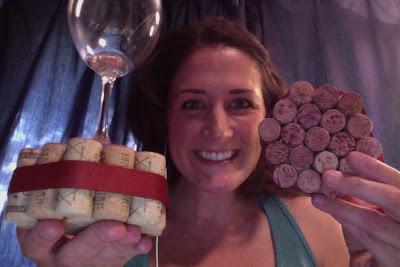
Cork Coasters!
A wee craft and a lot of love!
Super quick....
19 Corks + 10 inch zip ties = coaster.
A little ribbon + hot glue = finishing touches.

Thinking I'll hit the ban saw next to make them a more manageable height. They are a bit tall.
Hope this finds you OFF work on this Labor Day and doing something that makes you SMILE!
XO,
Lacy
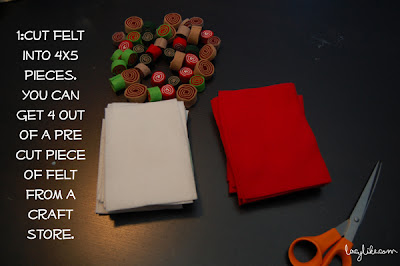
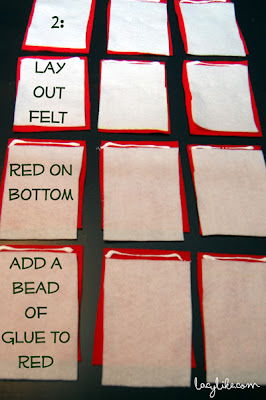
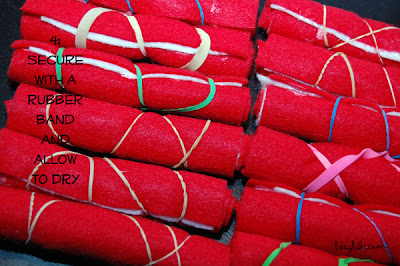
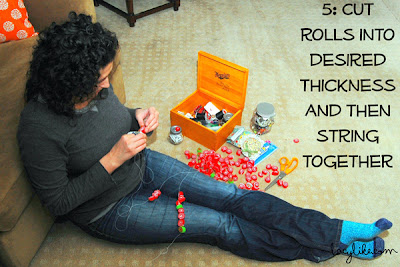
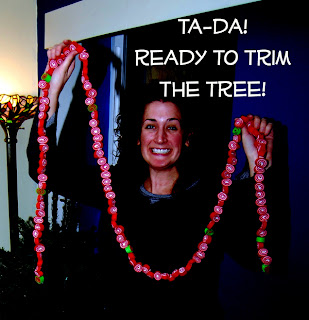
Peppermint Felt Garland Tutorial
Hello hello everyone!
We got two perfect little trees for our place over the weekend. For the bigger tree (4 whole feet) I made a little peppermint felt garland and thought I'd share it with you in a tutorial! If you ask me it makes the whole tree happy!
I used burlap coffee bags that Mema sent me as a tree skirt.
Happy crafting!
xo
Lacy


You can see the full set here.
Tutorial: Dreamy Photo Transfer
Lots of you have asked how I did the photo transfer for the India album so I've prepared a tutorial for you! It's so fun and so easy!

1. Gather supplies.
You will need:
*a surface to transfer to. I'm using the book we did at Artfest in the Tara Ross class, Every Person's Story.
*Gel Medium
*a paint brush
*a photo that has been scanned and printed onto regular copy paper.
*old gift card or credit card
*water
 2. Trim your scanned photo printed on regular copy paper and paint Gel Medium all over it. Yeap, paint right on the photo.
3. Flip it over and press it to surface picture side down. It should look like this. 4. Use an old gift card or credit card to smooth the paper down and remove any excess medium.
5. Allow to dry. I used a hairdryer to speed up the process ; )
6. Once dry wet the entire surface with water. I used my finger tips and lightly spread it on in layers. You don't want it to get too wet. 7. The paper will start to roll off and the ink pigment will have stayed on the gel medium! Continue to work the paper off from the center rolling out to the edges.
8. Ta Da! You've got a dreamy looking photo transfer! I especially love that the images are imperfect looking and grainy. Notice that when I started Cliff was on the left and once it's transferred I am on the left. Keep that in mind when selecting your photo to transfer. You might not want to select a photo with a lot of words b/c they will be backwards... or maybe you do!
Have fun you guys!
xxoo Lacy
Lacylike tutorial: Turn your old dvd covers into mini albums!
I am so excited to bring you this tutorial! I had so much fun making these and plan to keep on going til I run out of dvd covers. Last year Mema and I took all my dvd's out of the cases and put them into big cd books. It's such a space saver! I couldn't dare part with all those pretty covers so we stripped out the dvd holder part and tucked the covers away in a plastic shoe box in my studio. We just knew I could come up with something marvelous to do with them! Well, I have!
Supplies:
*dvd cover
*xacto knife
*cutting mat
*remnant paper (all papers for these projects came from my extra bin and it felt SOO good to use them for something)!
*big bite crop o dile for punching holes in the spine
*ribbon for binding
*embellishments
Drum roll please...


To make your own:
Start with a dvd cover.
I removed the black plastic dvd holder but you could leave it in if you want to include a mix cd as a gift or something fun like that!
Start with a dvd cover.
I removed the black plastic dvd holder but you could leave it in if you want to include a mix cd as a gift or something fun like that!

Next select a paper for the cover page. Since these covers are transparent they show through which is super cute. Lay flat on a cutting surface and trim the excess off with an xacto knife.
 Flip the cover over and start layering your papers varying the direction and size of the papers to add dimension and interest to your book. I used mostly double sided papers and remnant card stock.
A look at the papers I used in this book!

When you have your book thick enough (there's really no wrong way, decide how big you want to layer it and remember that each sheet you lay down is worth two pages) flip over and punch 4 holes for binding. I did two holes about 2 inches from the outside and then two holes about an inch from the center to make sure that I punched the small pieces of paper.
 Next pick ribbon that makes you smile.
 Starting from the inside (where the paper is) weave the ribbon to the outside spine and tie in a bow. You will have two separate ribbon bows.


Lay the papers flat on your cutting surface and trim off excess edges. Once you fold the book you may need to trim a bit more to make sure that the papers do not stick out.


Now it's time to add embellishments!
Staple extra scraps to the pages, add tabs, ribbons, etc. It's all up to you how you want to decorate your mini book. : )

I filled this book with meaningful clippings and messages to the recipient (she hasn't received it yet so sry for being a little cryptic), lots of ribbons and handwritten notes. This very well might end up being a book sans photos! I know--- gasp right! BUT sometimes the written word and images that are not photographs of the familiar are so powerful.


The ribbons add a lot of bulk to the book so to tie it all together I punched a small hole in the back cover and tied a thin black ribbon to be wrapped around the book like a journal.

Eh Viola!

I hope this little idea gets your creative juices flowing!
Love love love!
Lacy